

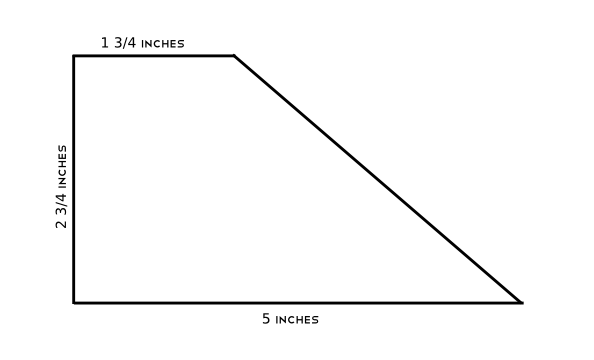
Now draw a diagonal line connecting the 1 3/4 inch line with the 5 inch line.
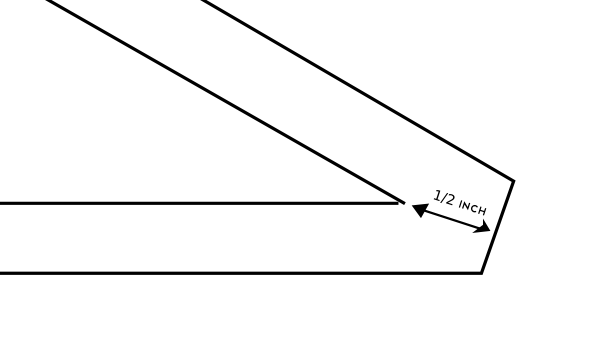
Now draw small marks as seen below at the inch mark specified. One-fourth inch in on the bottom and 1/2 inch up for the bottom; 1/4 inch in at the top and 1 1/2 inch down at the top.

Now draw diagonal lines to connect the marks you made,as seen below.


That's it! This pattern is for one half of the heel, so you will need to cut out two pieces for each fabric for one shoe. Here is a picture of my pieces cut out and ready to go!

Check out part one of the assembly process!


No comments:
Post a Comment